Guest post by Christine at Dimes and Donuts
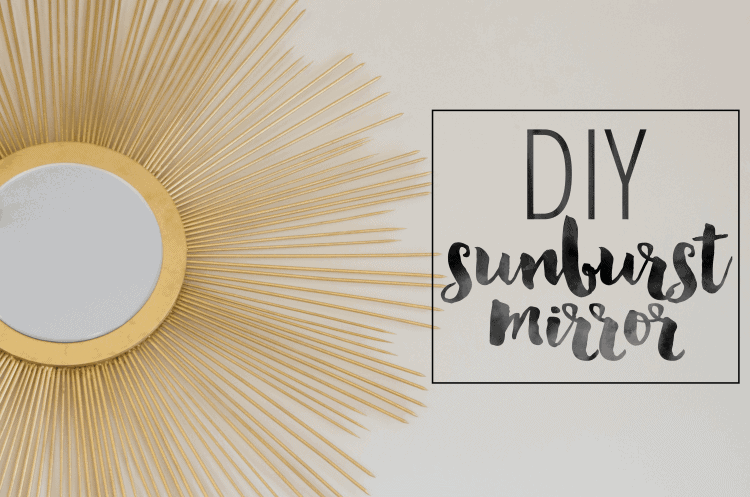
Hey, everyone! I wanted to share a fun DIY sunburst mirror project I completed recently! I have been lusting over all things gold, especially mid-century-style sunburst mirrors. A lot of the beautiful mirrors that I found will cost you hundreds of dollars which, I don’t have to spend on a single mirror. I’m on a tight budget so I decided, hey, why not make my own?
These gorgeous mirrors go great with any style of home. They make great centerpieces, a nice feature on gallery walls, bathroom mirrors, etc. They have a classic style.
To get started you’ll need a couple of supplies.
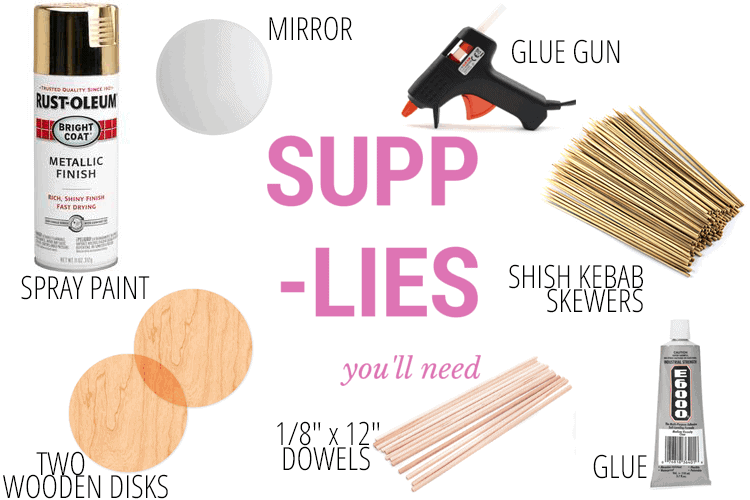
- 1 can of spray paint – I picked gold. All gold everything lately!
- 2 flat wooden disks approximately 10″ wide – I picked mine up at Hobby Lobby. My bottom disk was actually a peace sign. It worked just fine and already had a hook on the back for hanging!
- 1 mirror – I picked up a mirror slightly smaller than my wooden disks for a border. Also from Hobby Lobby.
- A couple of packs of 1/8″ x 12″ wooden dowels – Found mine at Hobby Lobby.
- A couple of packs of Shish Kebab skewers – Found mine at the grocery store.
- Glue gun
- E6000 craft glue – I purchased the clear formula. This can also be found at Hobby Lobby.
- Sandpaper (optional)
Directions
1. For variety, I used both wooden dowels and skewers. The dowels do not come sharped like the skewers, because I wanted them to match I chose to sharpen each dowel. I tried to use both an electric pencil sharper and a hand pencil sharpener but with no luck. Maybe you can try your hand. I found the best option was to use sandpaper to sand each dowel to a point.
2. Once I had all my dowels and skewers ready, I began to lay them out in a pattern that I liked. I found it was easy enough to eyeball but you could also draw yourself some guidelines using a ruler.
3. Once I had a pattern that I was happy with I began gluing the sticks down with my glue gun. I was heavy-handed with the glue to make sure those sticks aren’t going anywhere. Glue before you place the stick, glue after, around, on top, and you get the point. Go crazy!
4. Once you are finished with gluing you can attach your second flat wooden disk with your E6000 glue. This glue is moveable so you can take some time to make sure the disk is perfectly where you want it. Once I was happy with the placement, I stacked a couple of textbooks on top and left the glue to dry for 24 hours.
5. Once your glue has dried for 24 hours, spray paint your soon-to-be mirror the color of your choice.
6. Once your spray paint has dried, use your E6000 glue to attach the mirror to the front of the wooden disk. Once again, I placed a couple of textbooks on the top and left the glue to dry for another 24 hours.
This project involves a lot of waiting for glue to try and as an impatient person, I can say from experience you’ll get through it 🙂 Once your glue is dry you can hang your masterpiece and gaze at the beauty that you have created!
Thanks for reading. If you make a mirror of your own, let me know I’d love to see it! Happy crafting! -Christine